Logitech G305 disassembly
I couldn't find clear disassembly pictures myself when I needed to know what is inside the mouse without damaging the slippery pads at the bottom for no reason. Maybe they are useful to someone else if you need to know if your project is possible.
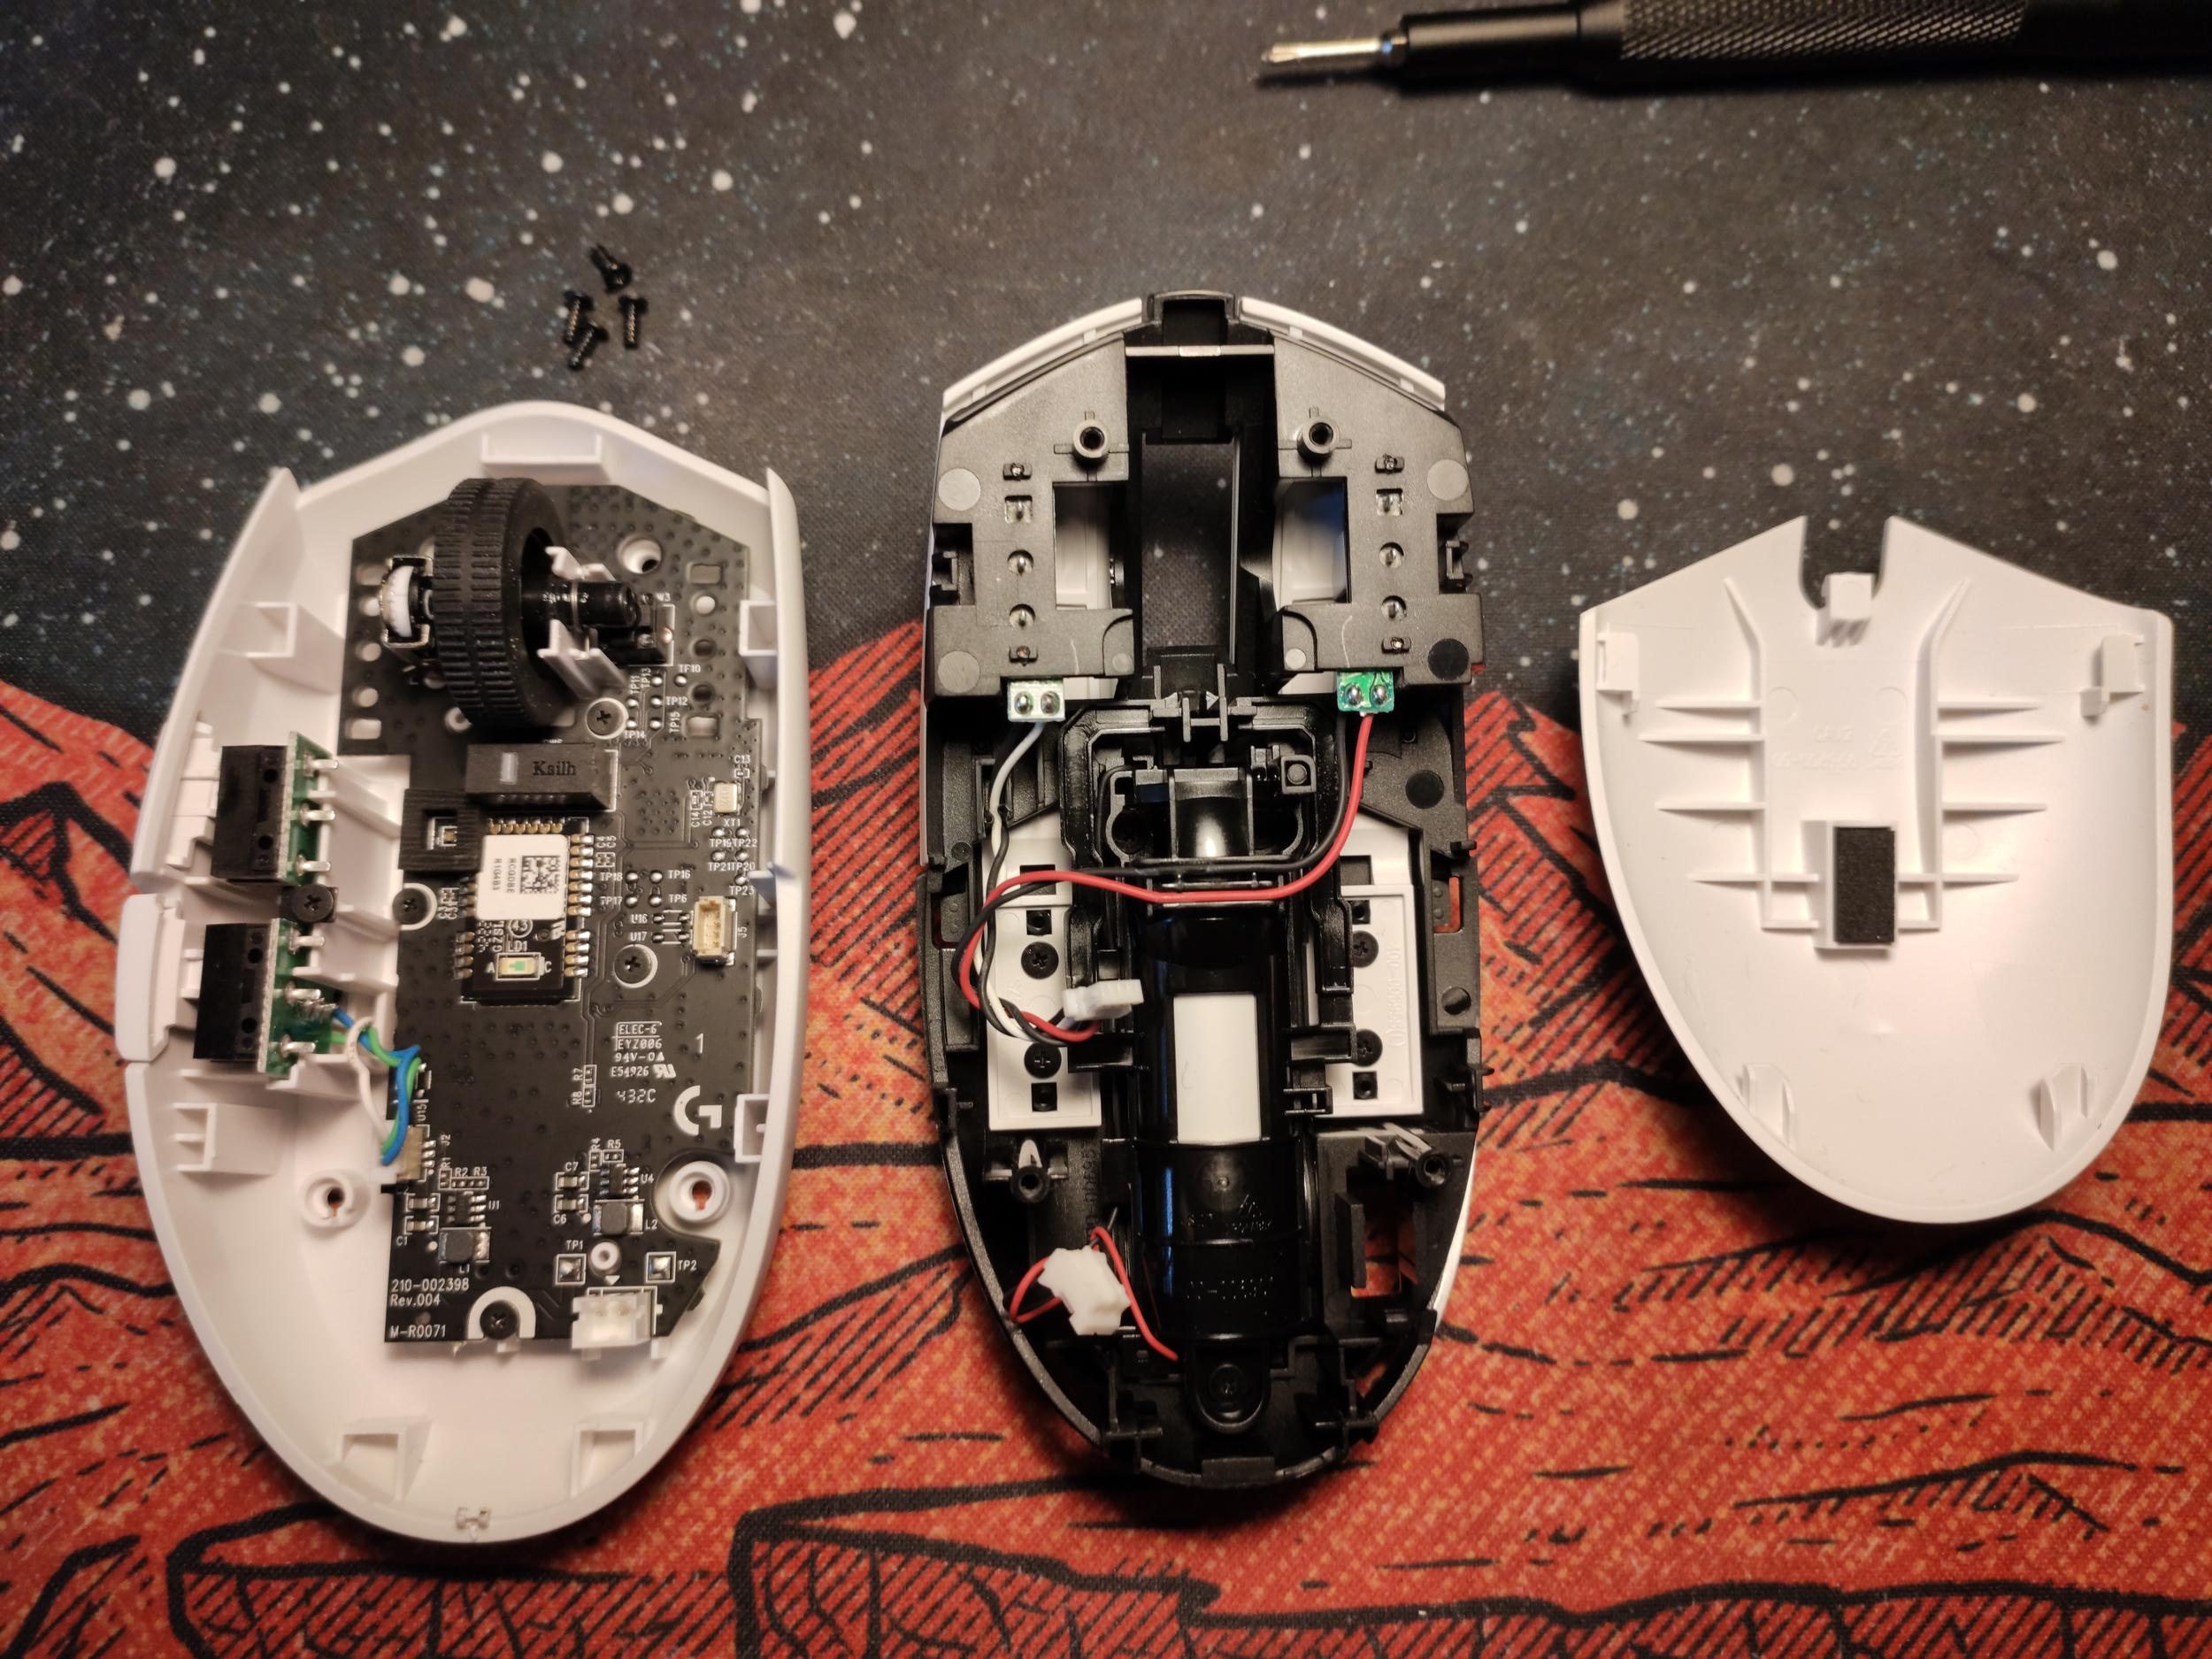
Disassembly
- Turn off the mouse by flipping the switch at the bottom so that the red color is visible.
- Open the battery cover and put it aside.
- Remove the battery.
- Remove the four sliders from the bottom of the mouse.
- Remove the four screws which are hidden underneath the four sliders.
- Gently lift the upper part of the mouse out of the bottom shell minding the two connectors.
- Disconnect the two connectors gently so that you can separate the two halves of the mouse.

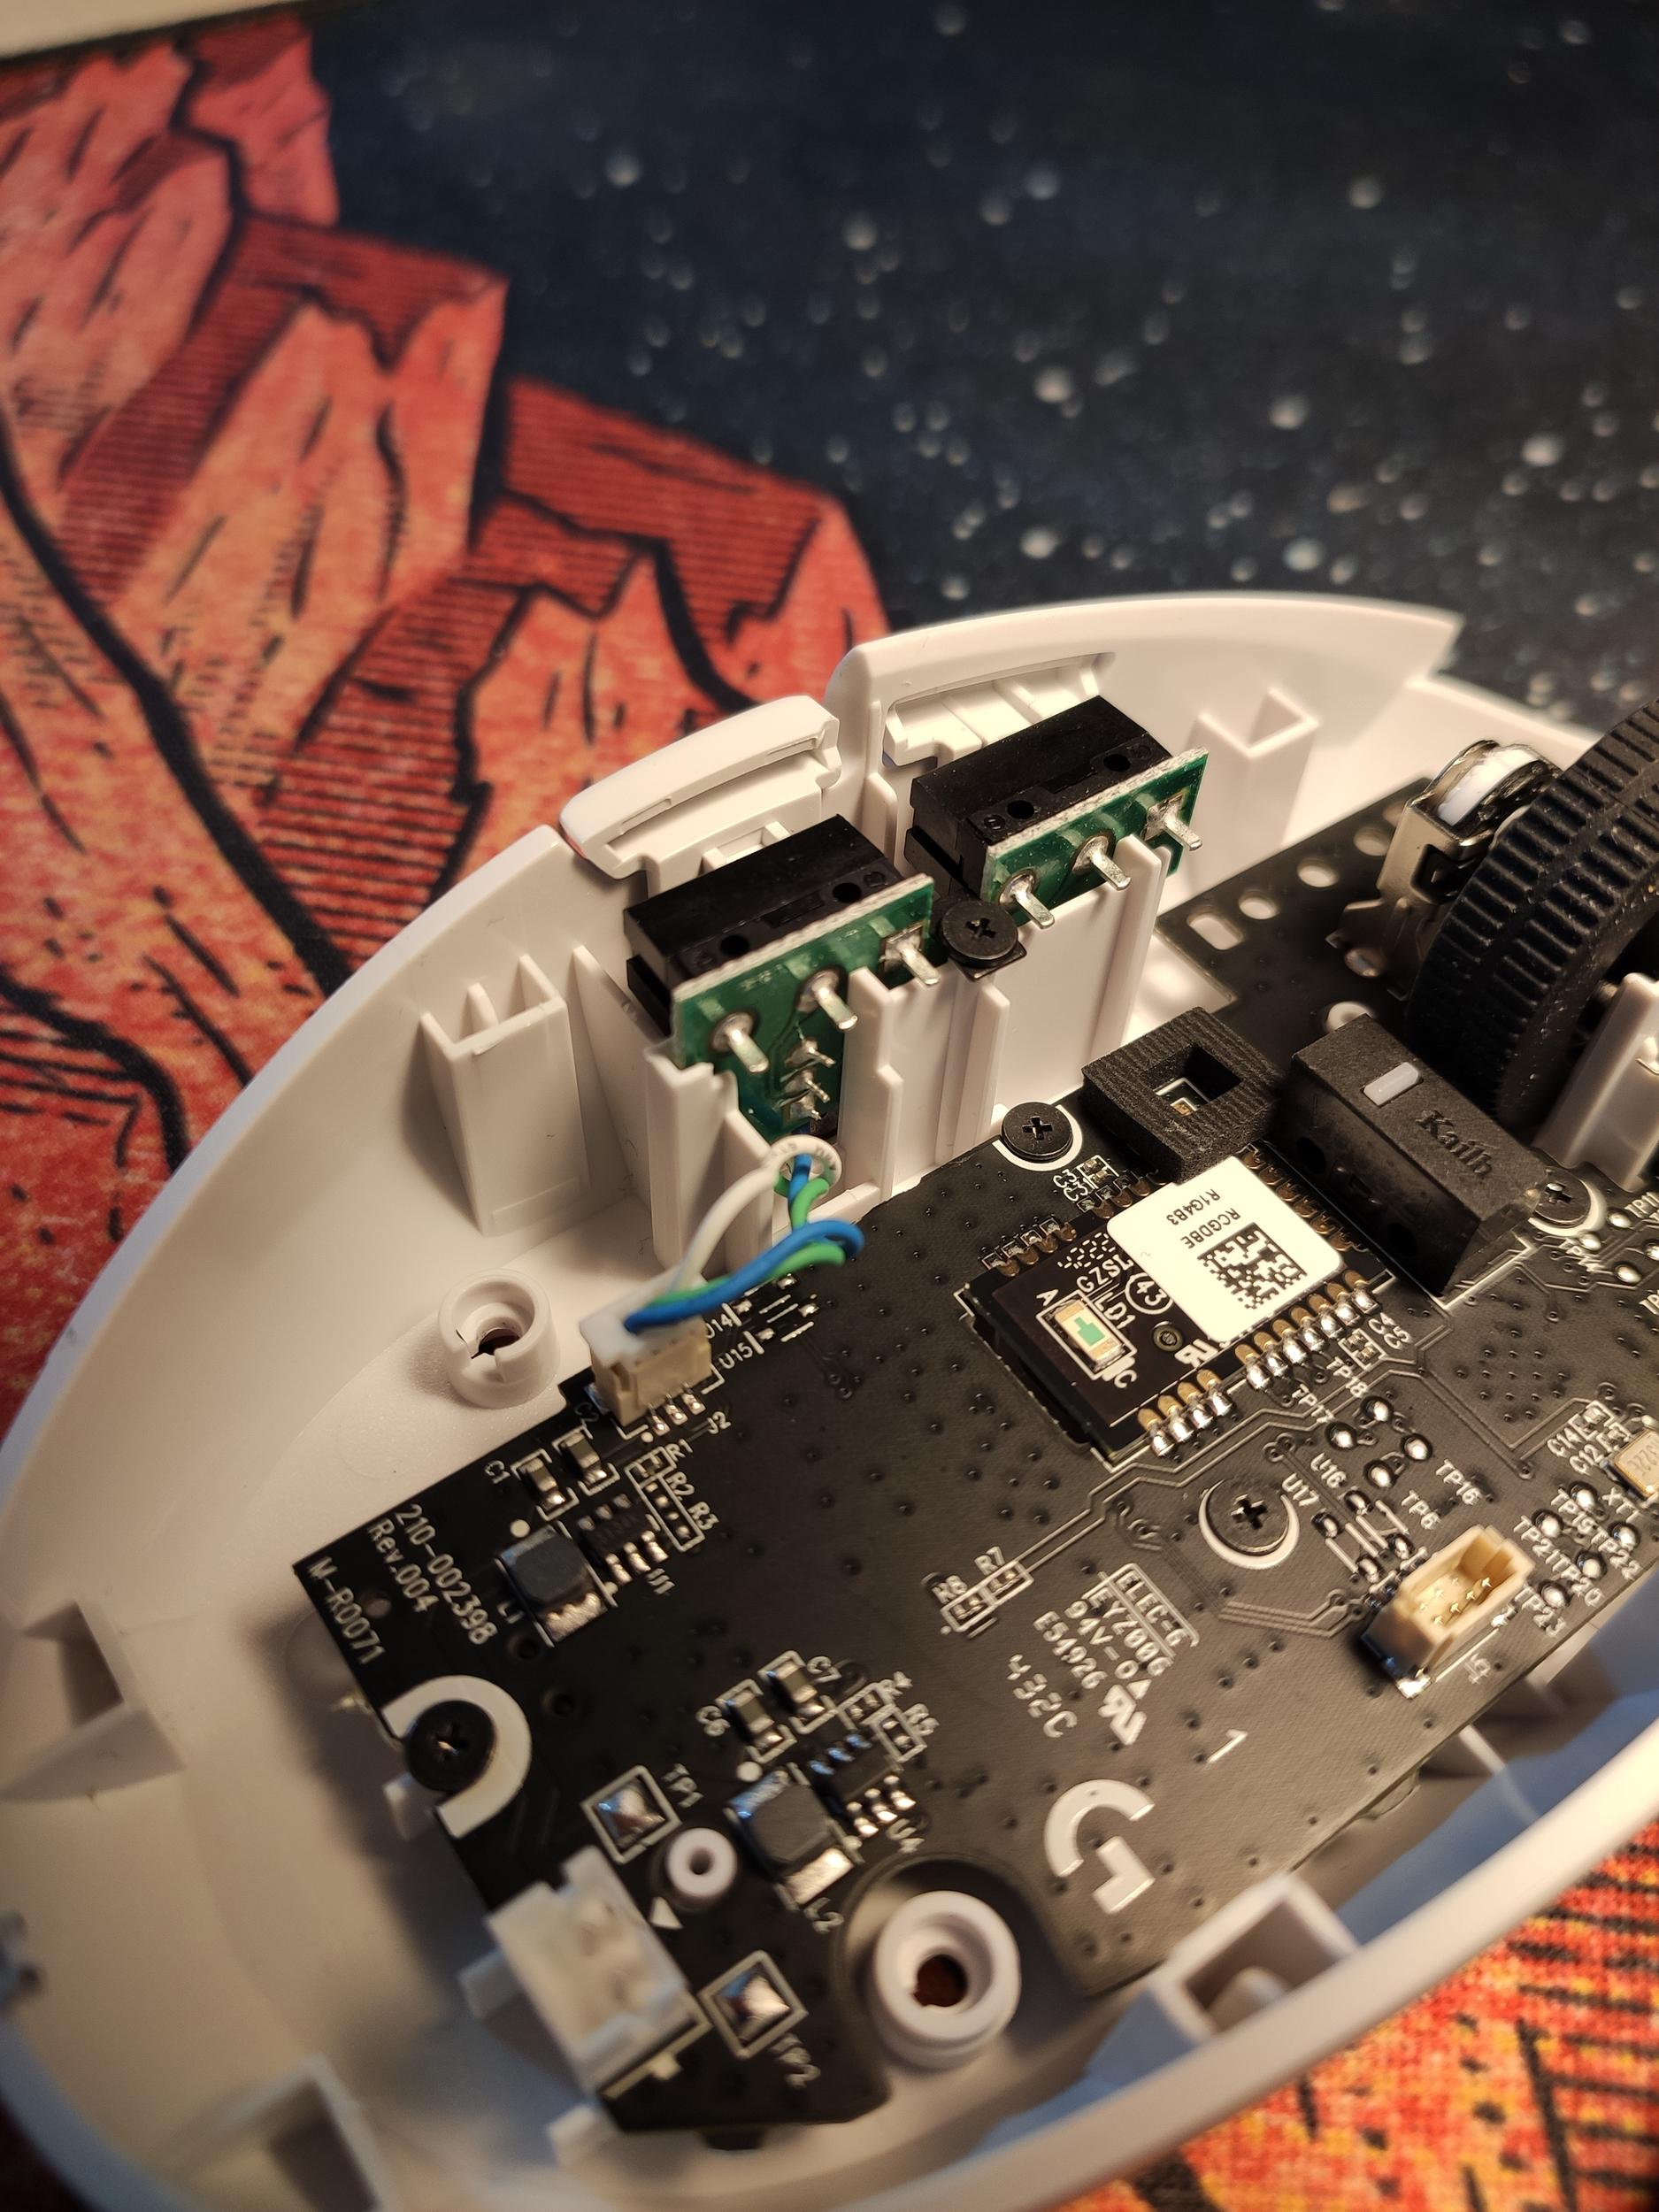
Accessing the side button switches
- Gently disconnect the connector linking the side button board to the main board.
- Remove a single screw holding the side button board.
- Gently lift the side button board up.
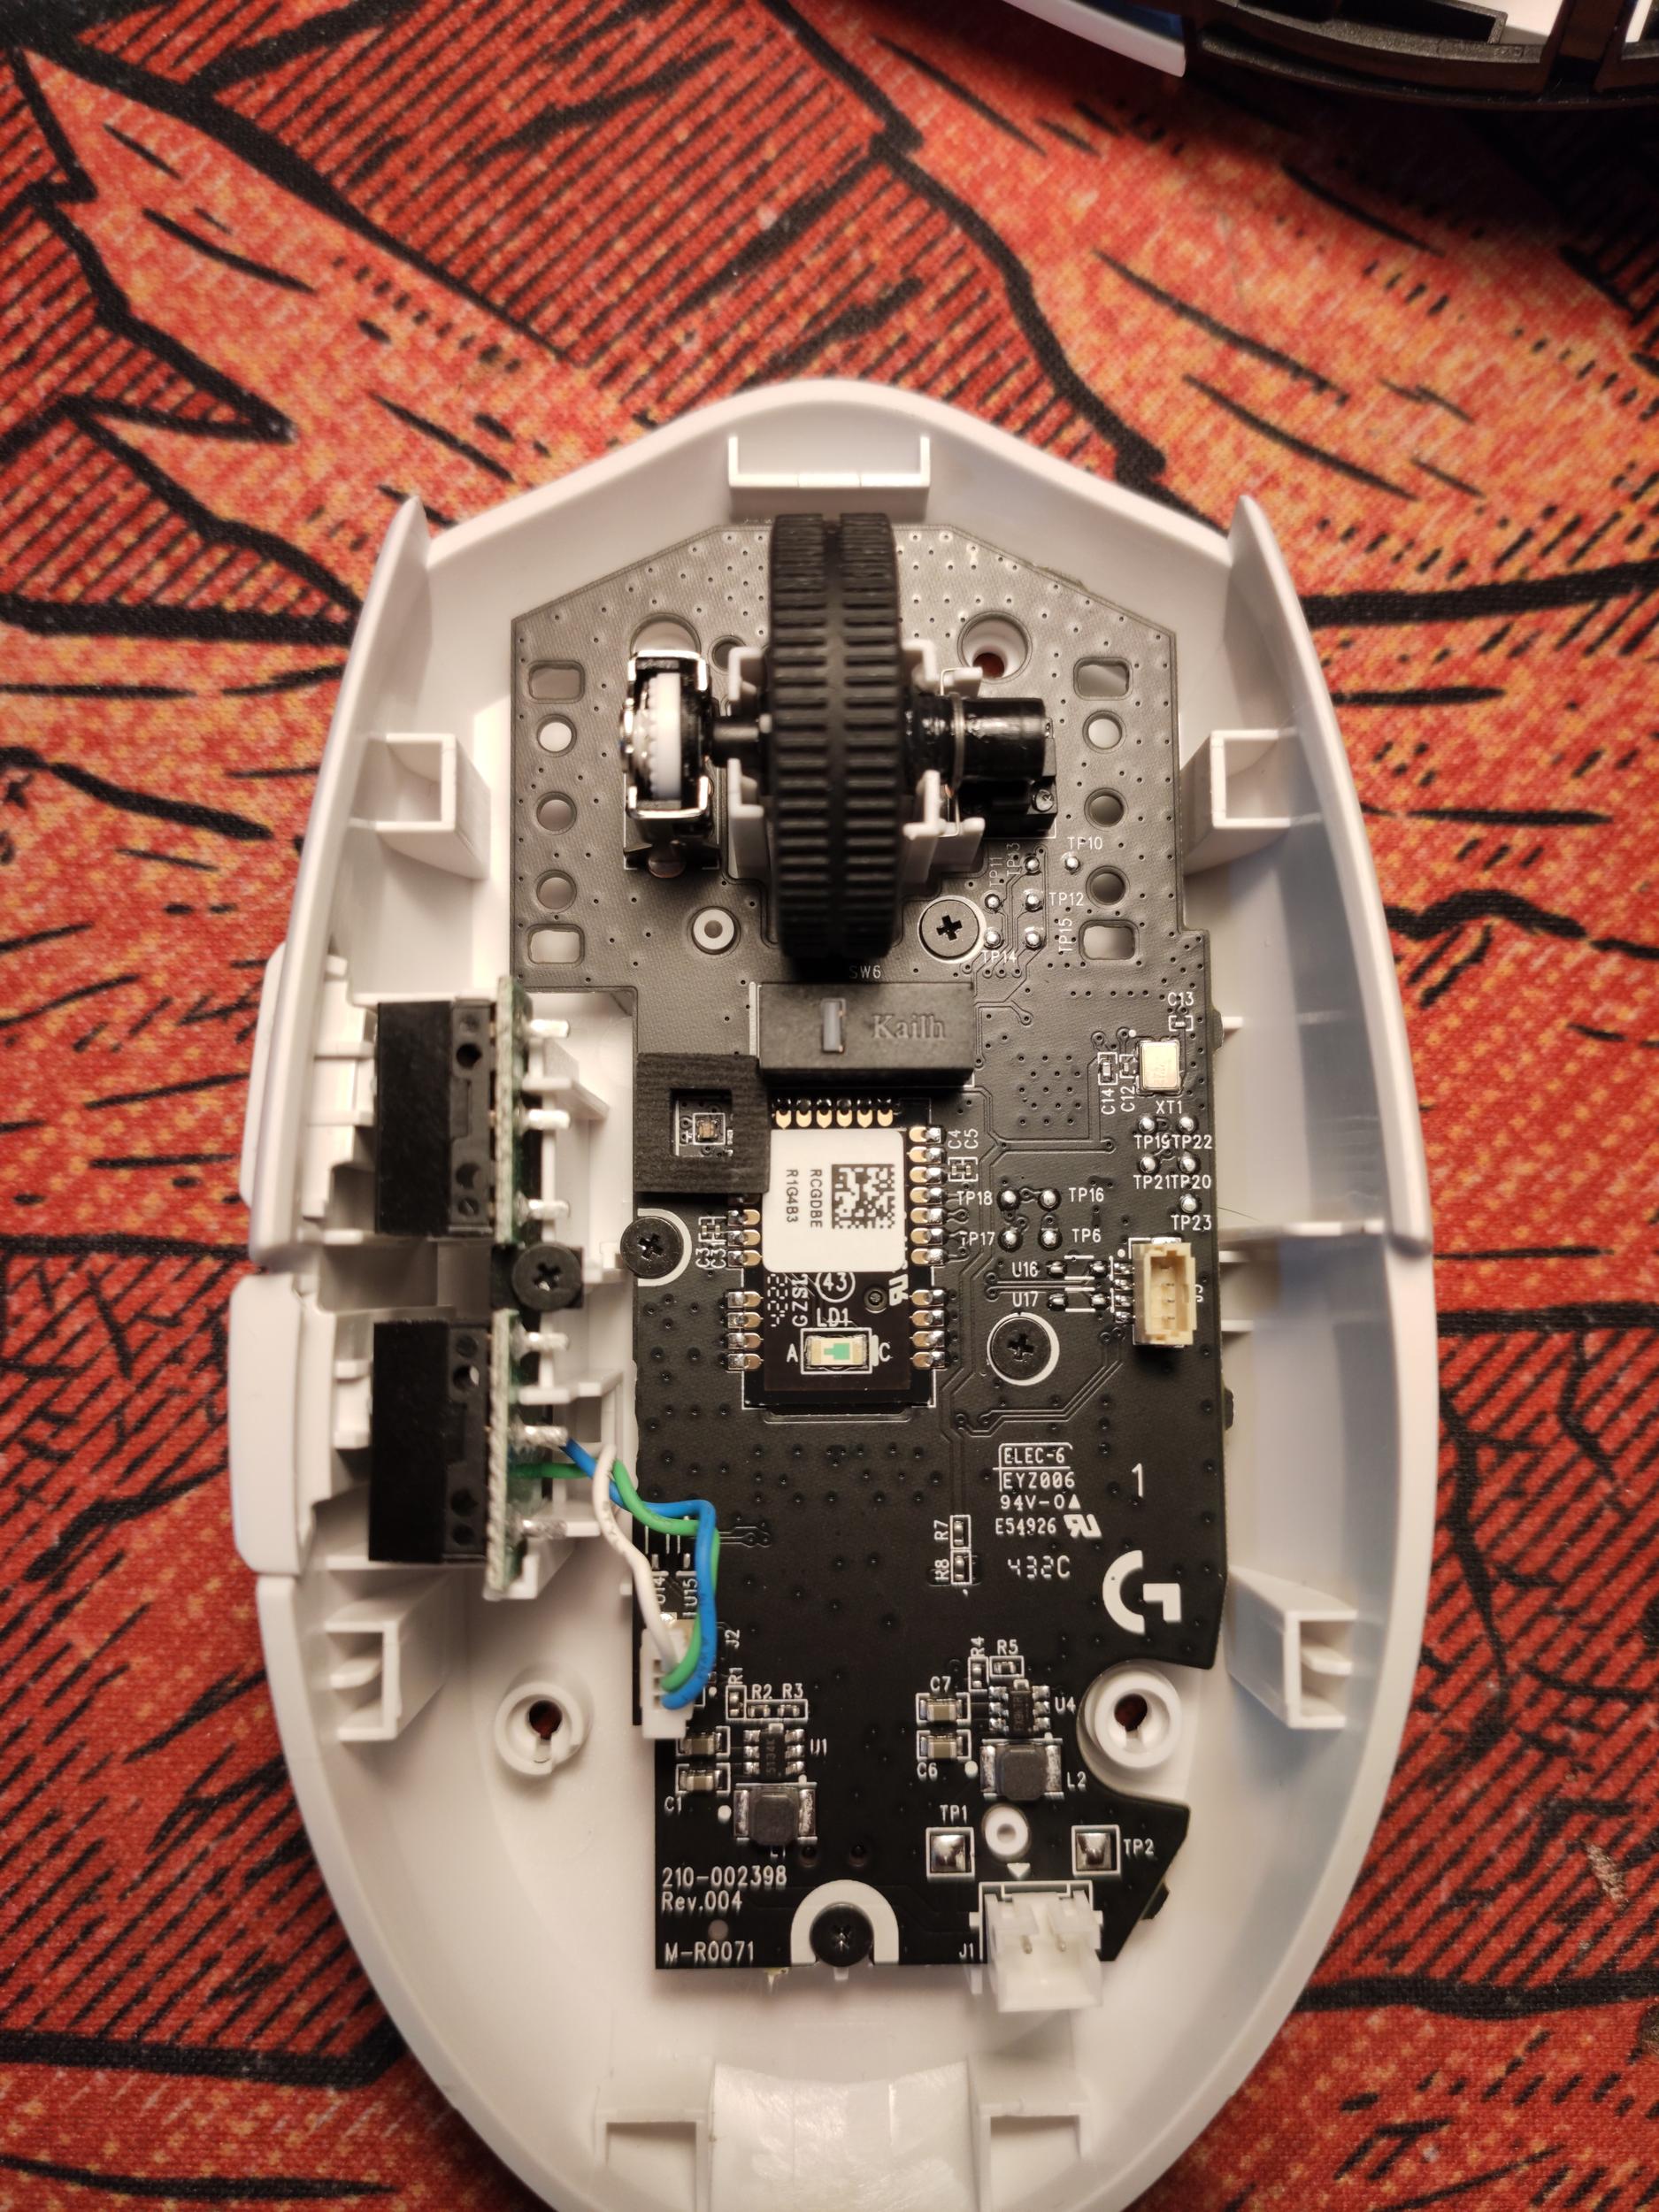
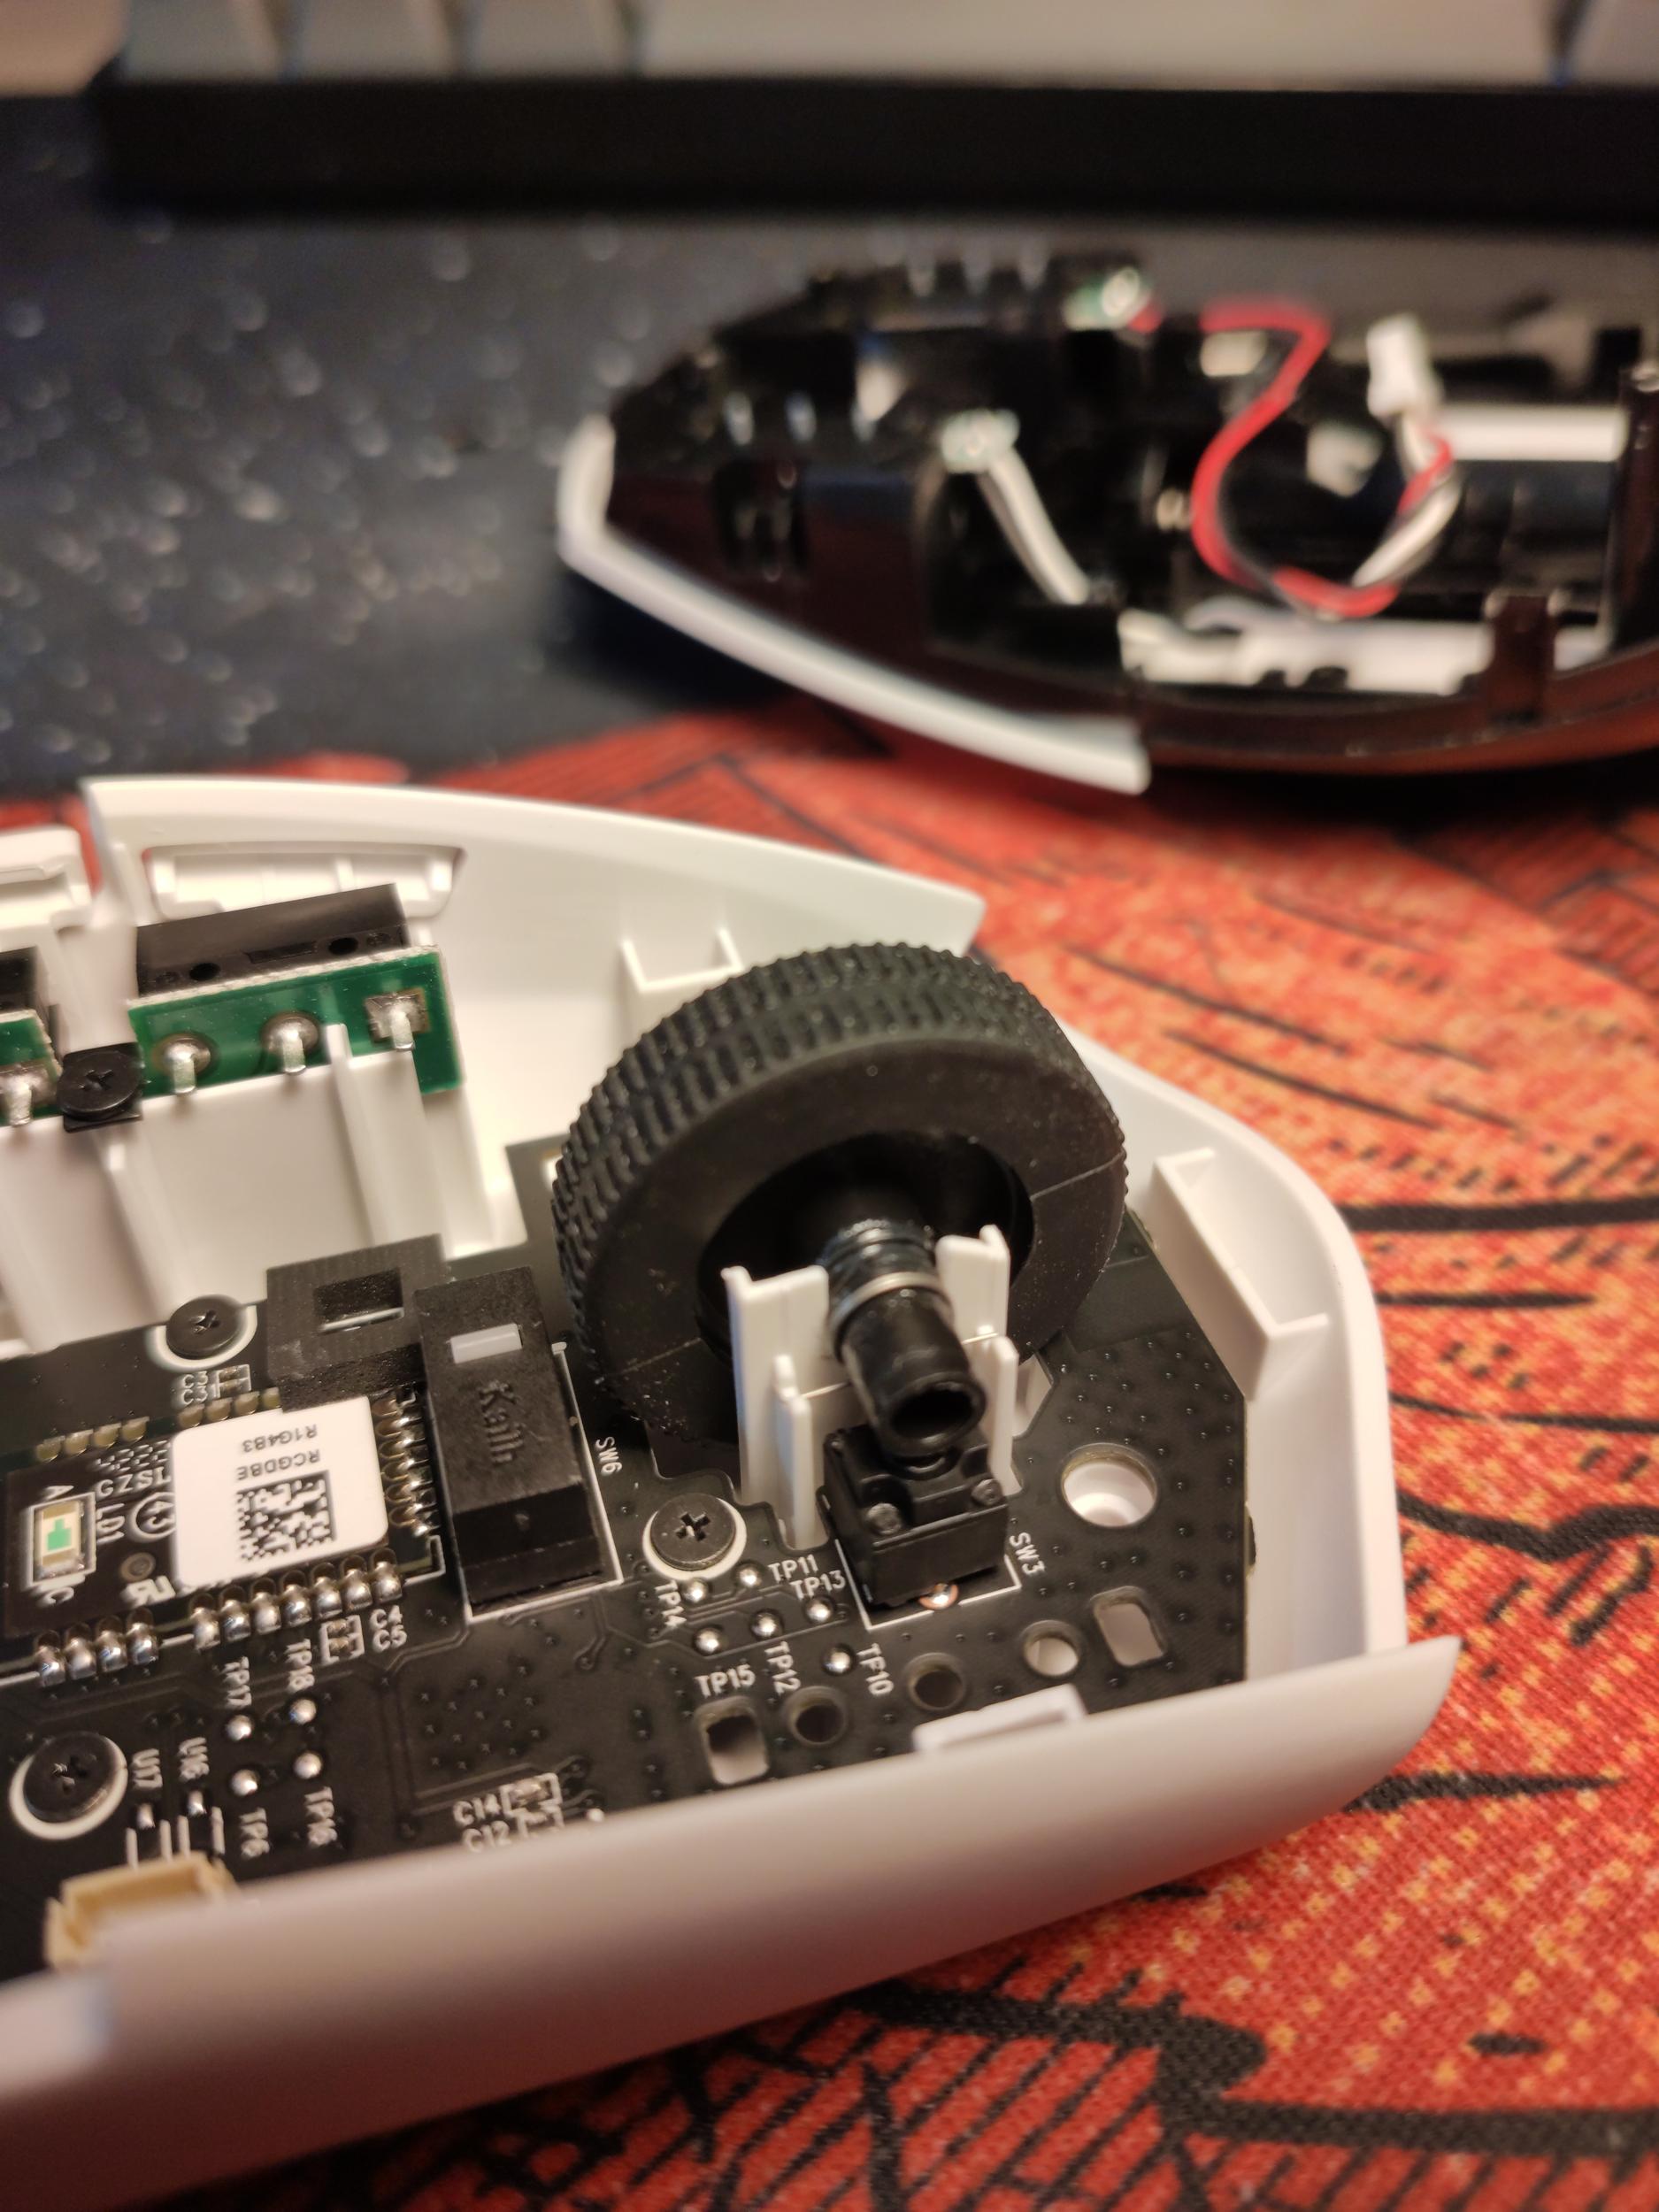
Accessing the mouse wheel encoder and switch as well as the DPI selector switch
- Remove the four screws which hold the board down.
- Gently lift the board out of the plastic shell.
Accessing the main button switches
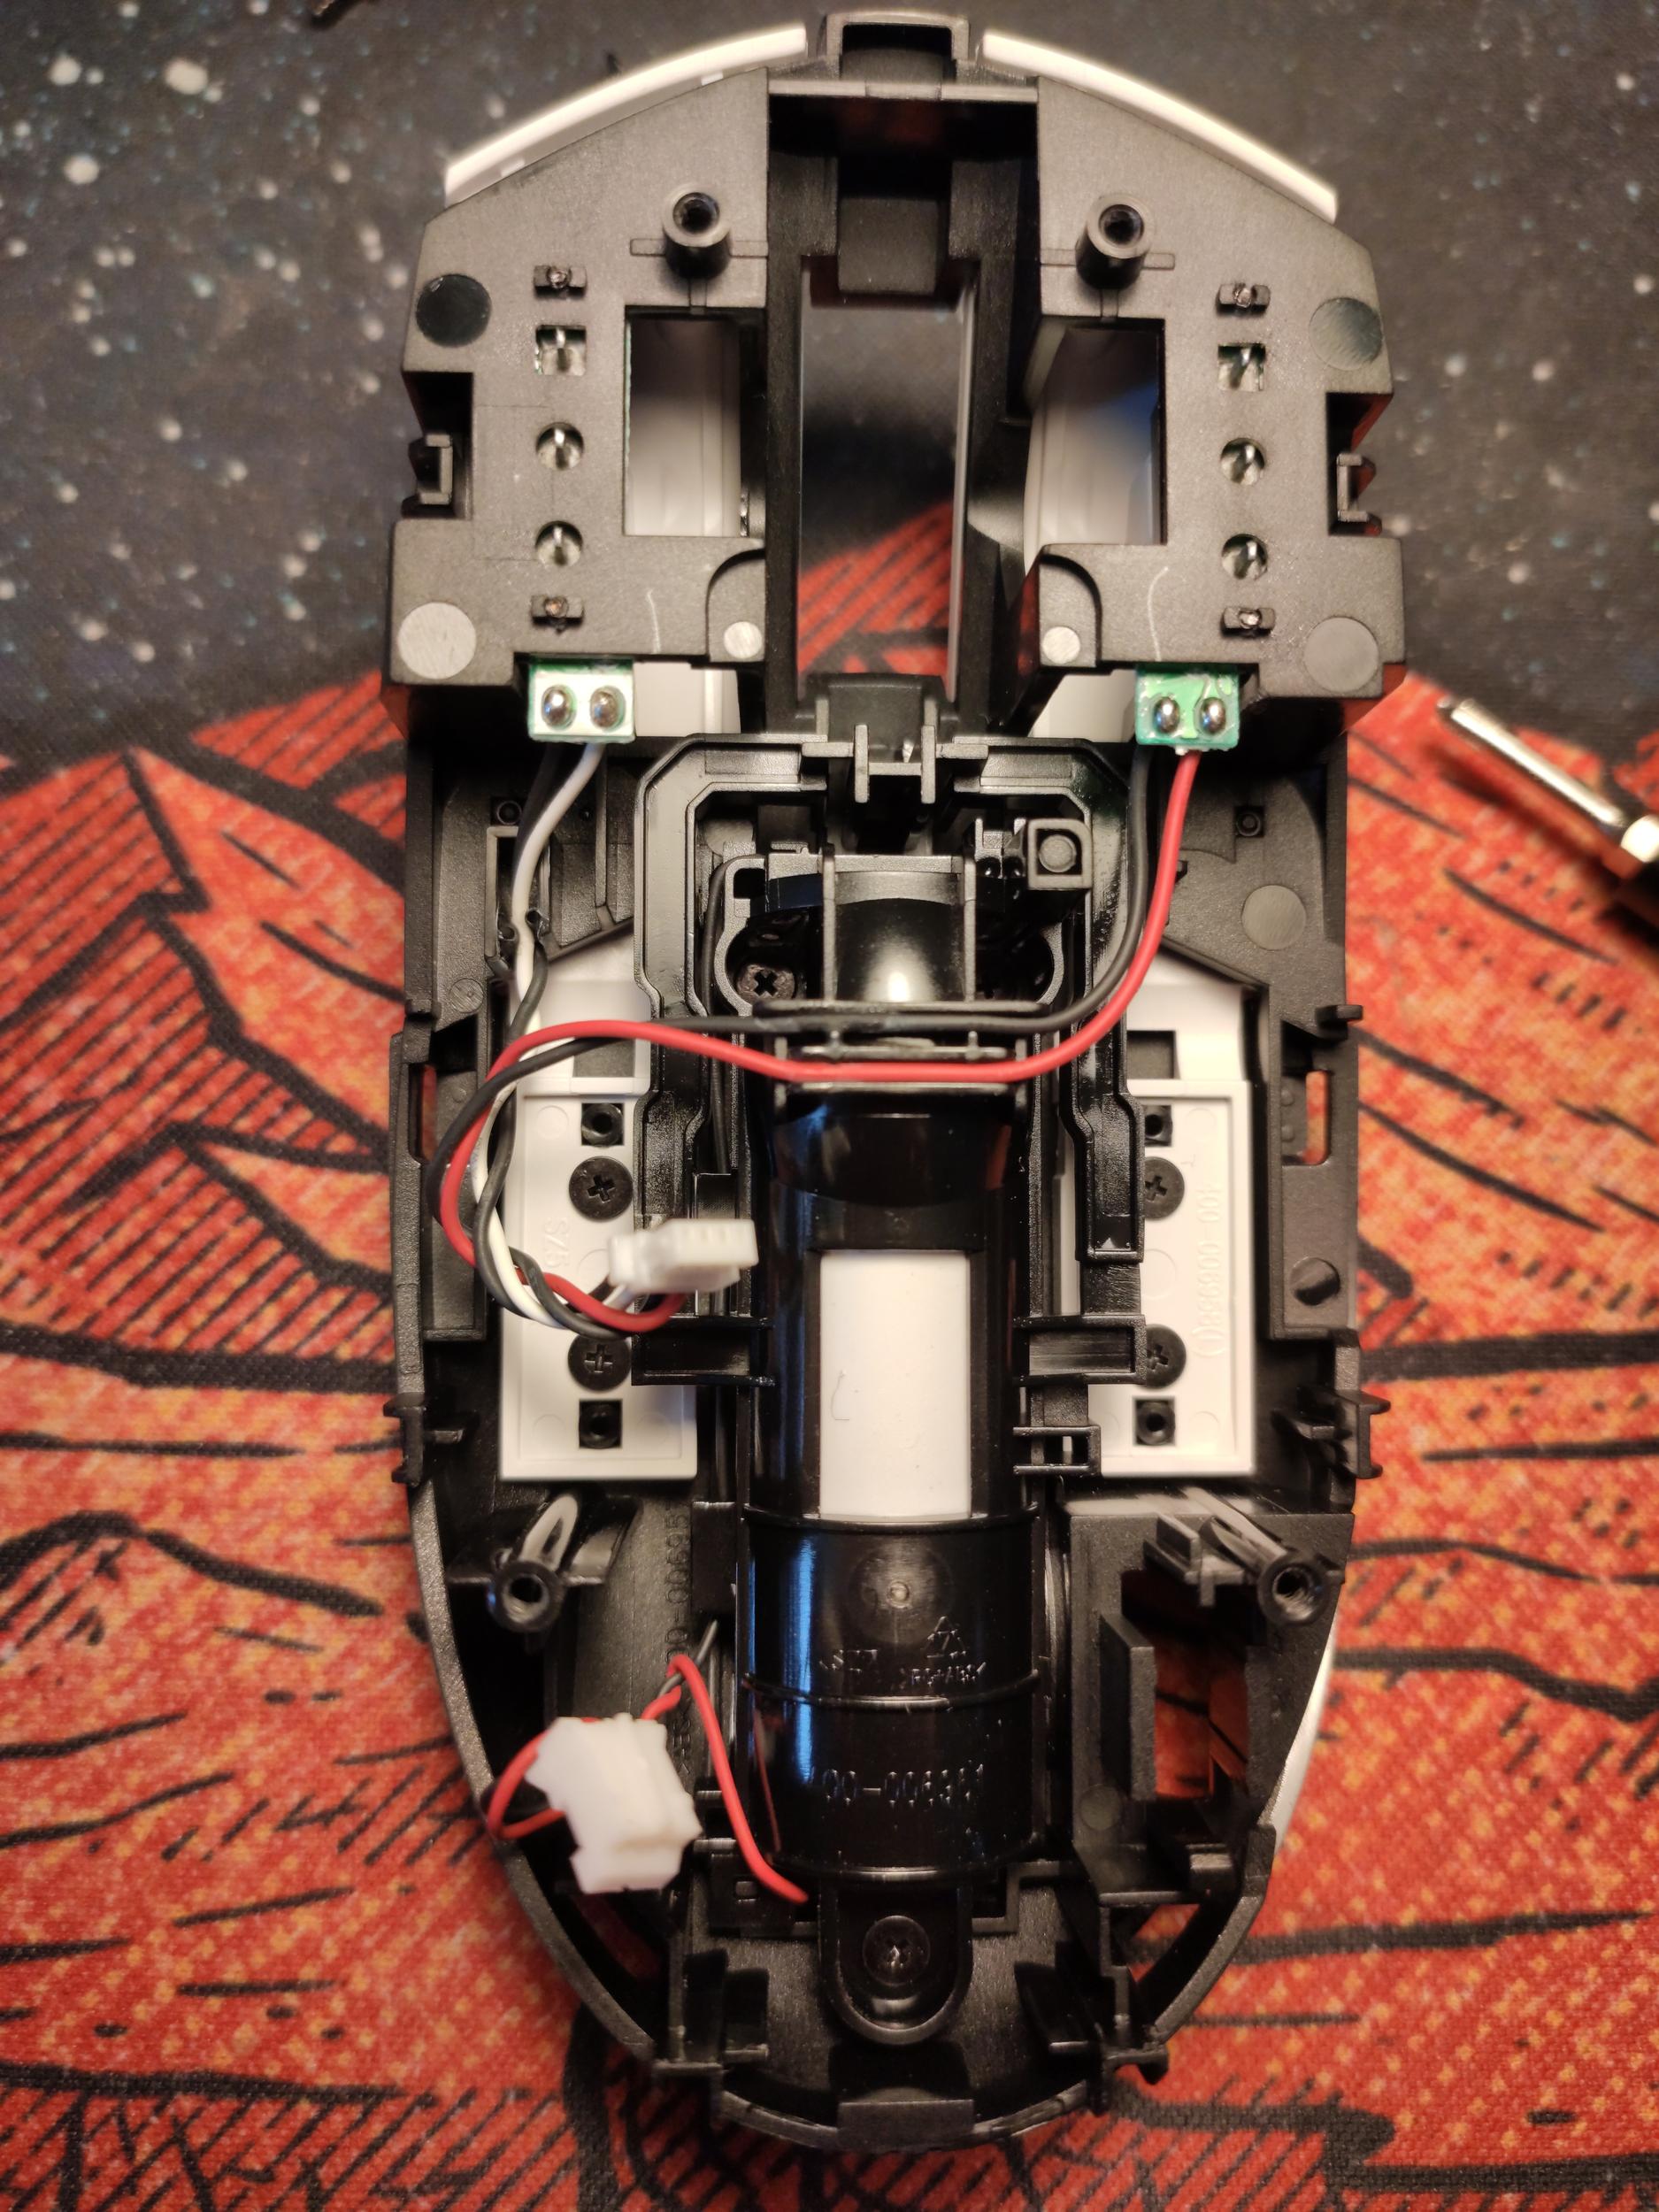
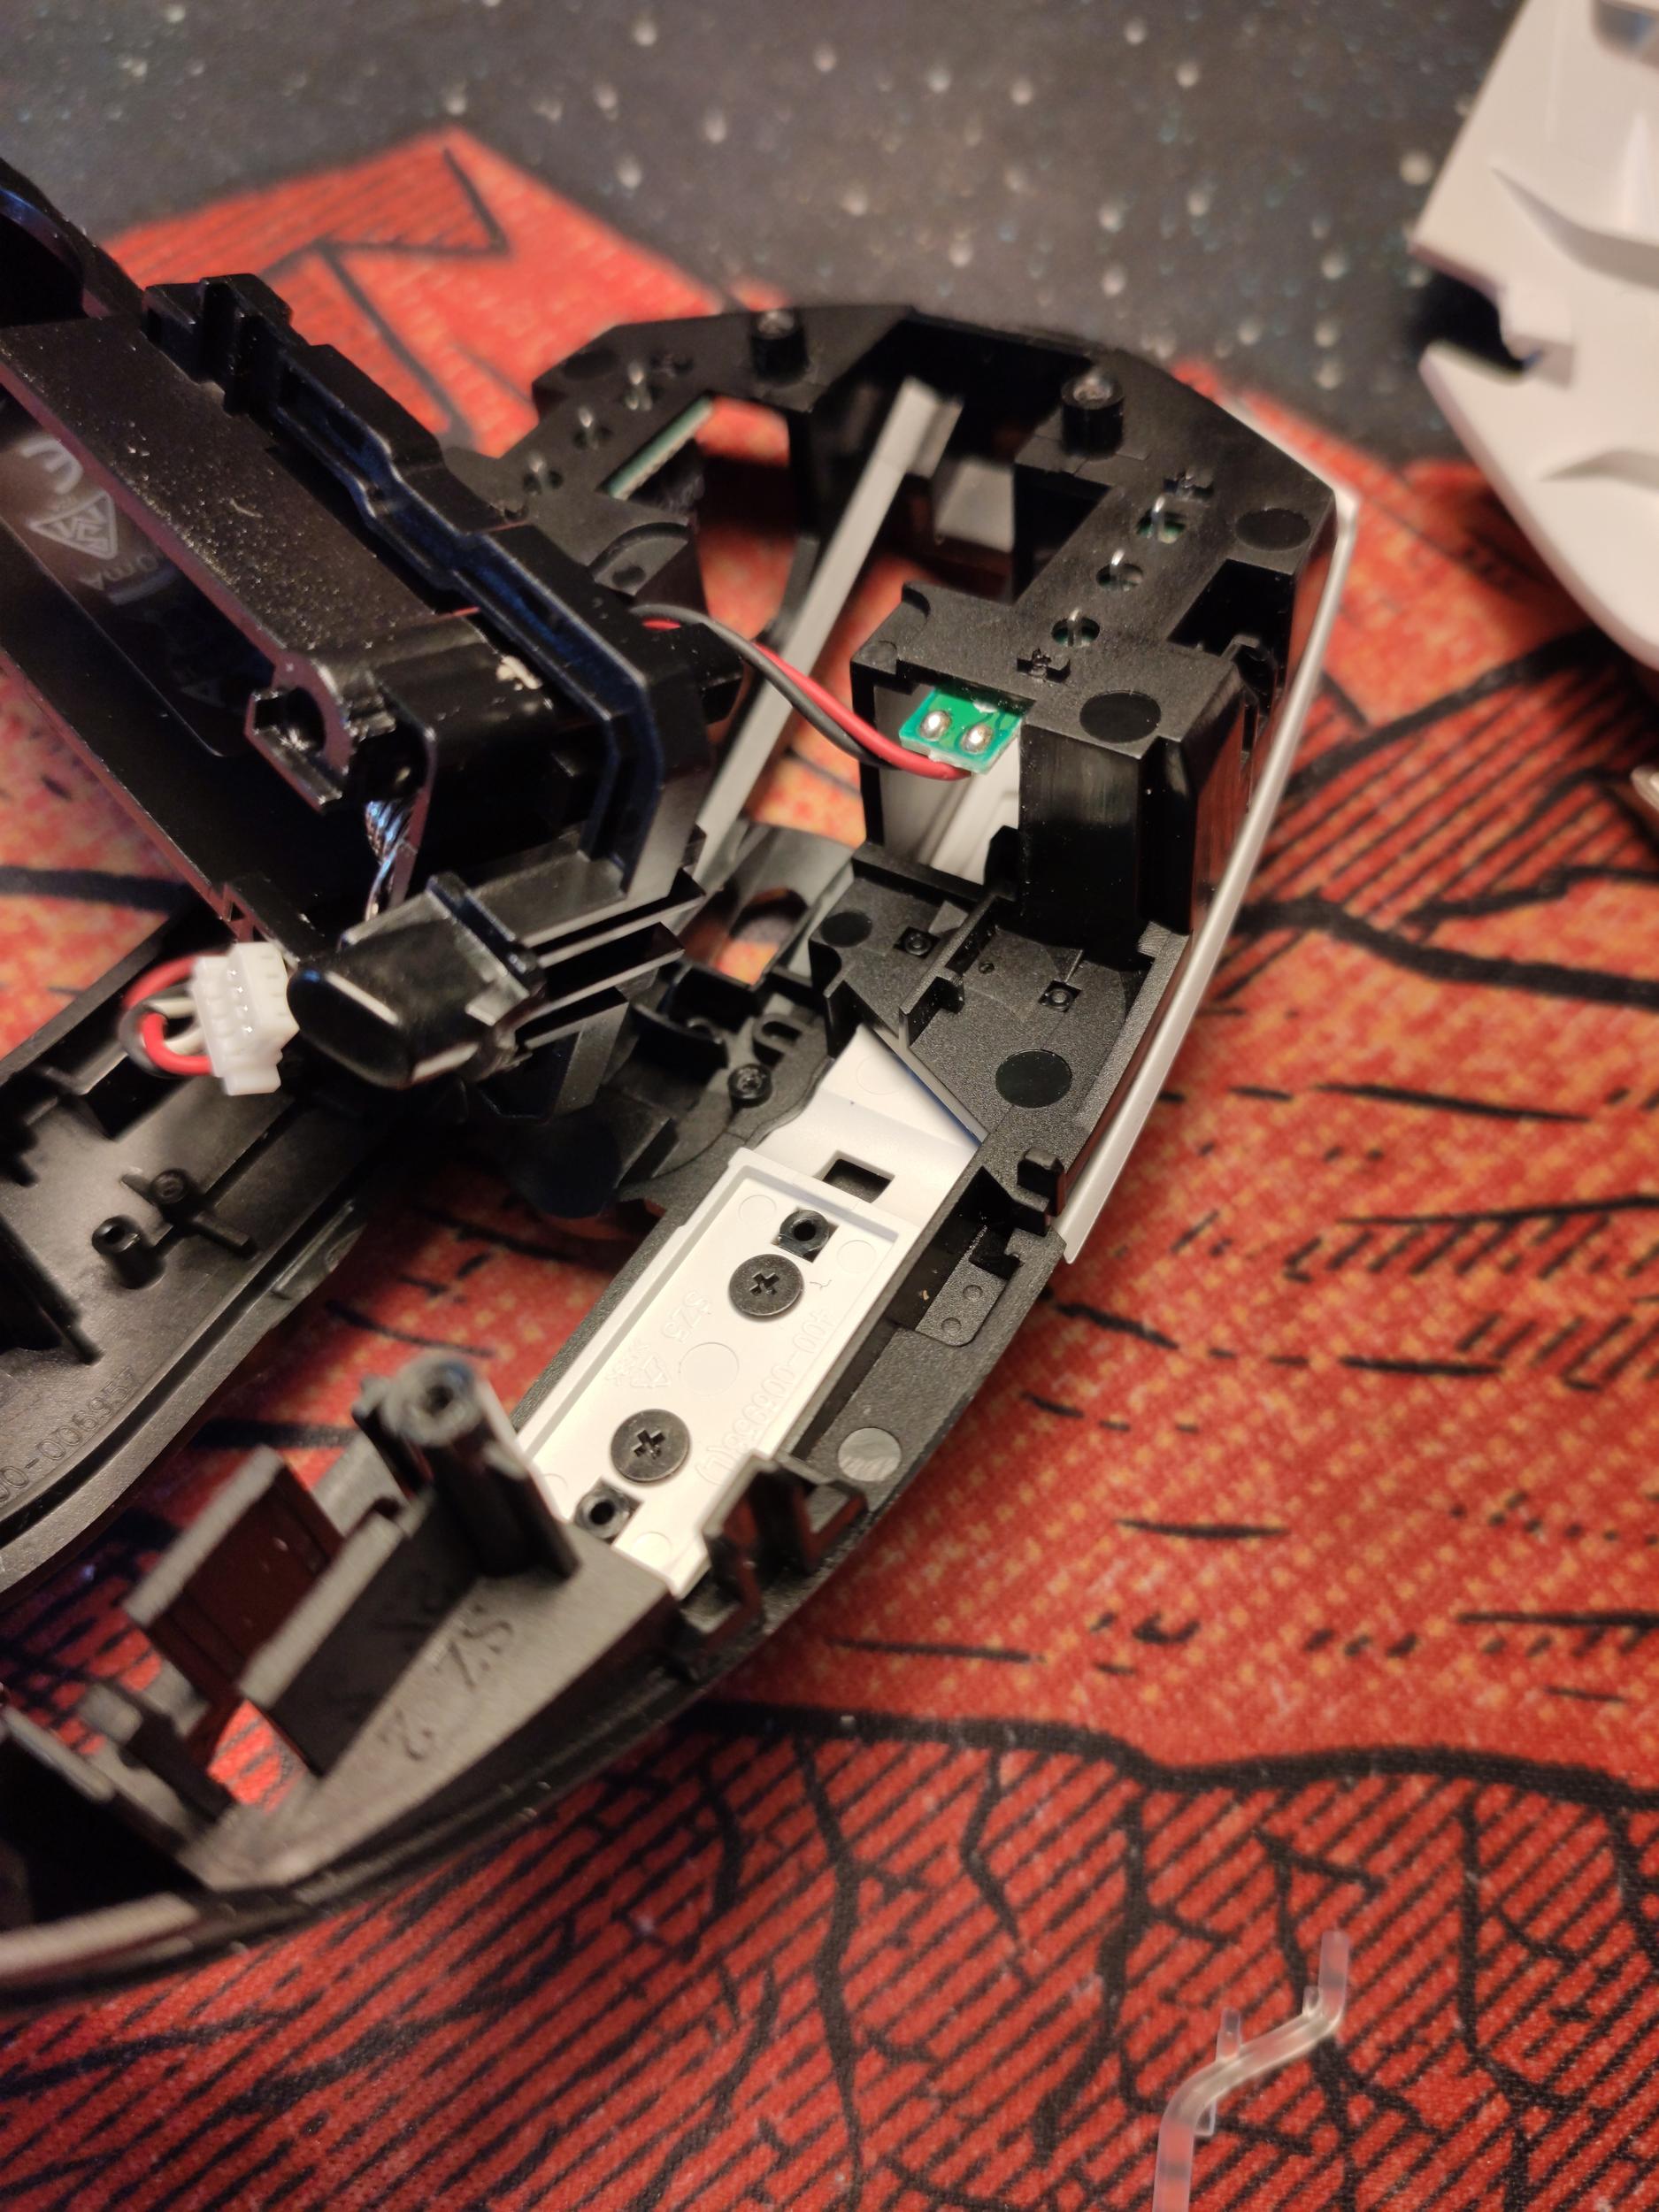
- Remove the three screws which attach the battery compartment to the upper half of the shell.
- Gently lift the battery compartment out of the shell minding the power connector and the main switch connectors. Note how the DPI LED "light channel" made out of semi-transparent plastic sits in the battery compartment housing.
- Remove the four screws holding the main buttons and gently slide them out of the upper part of the plastic shell.
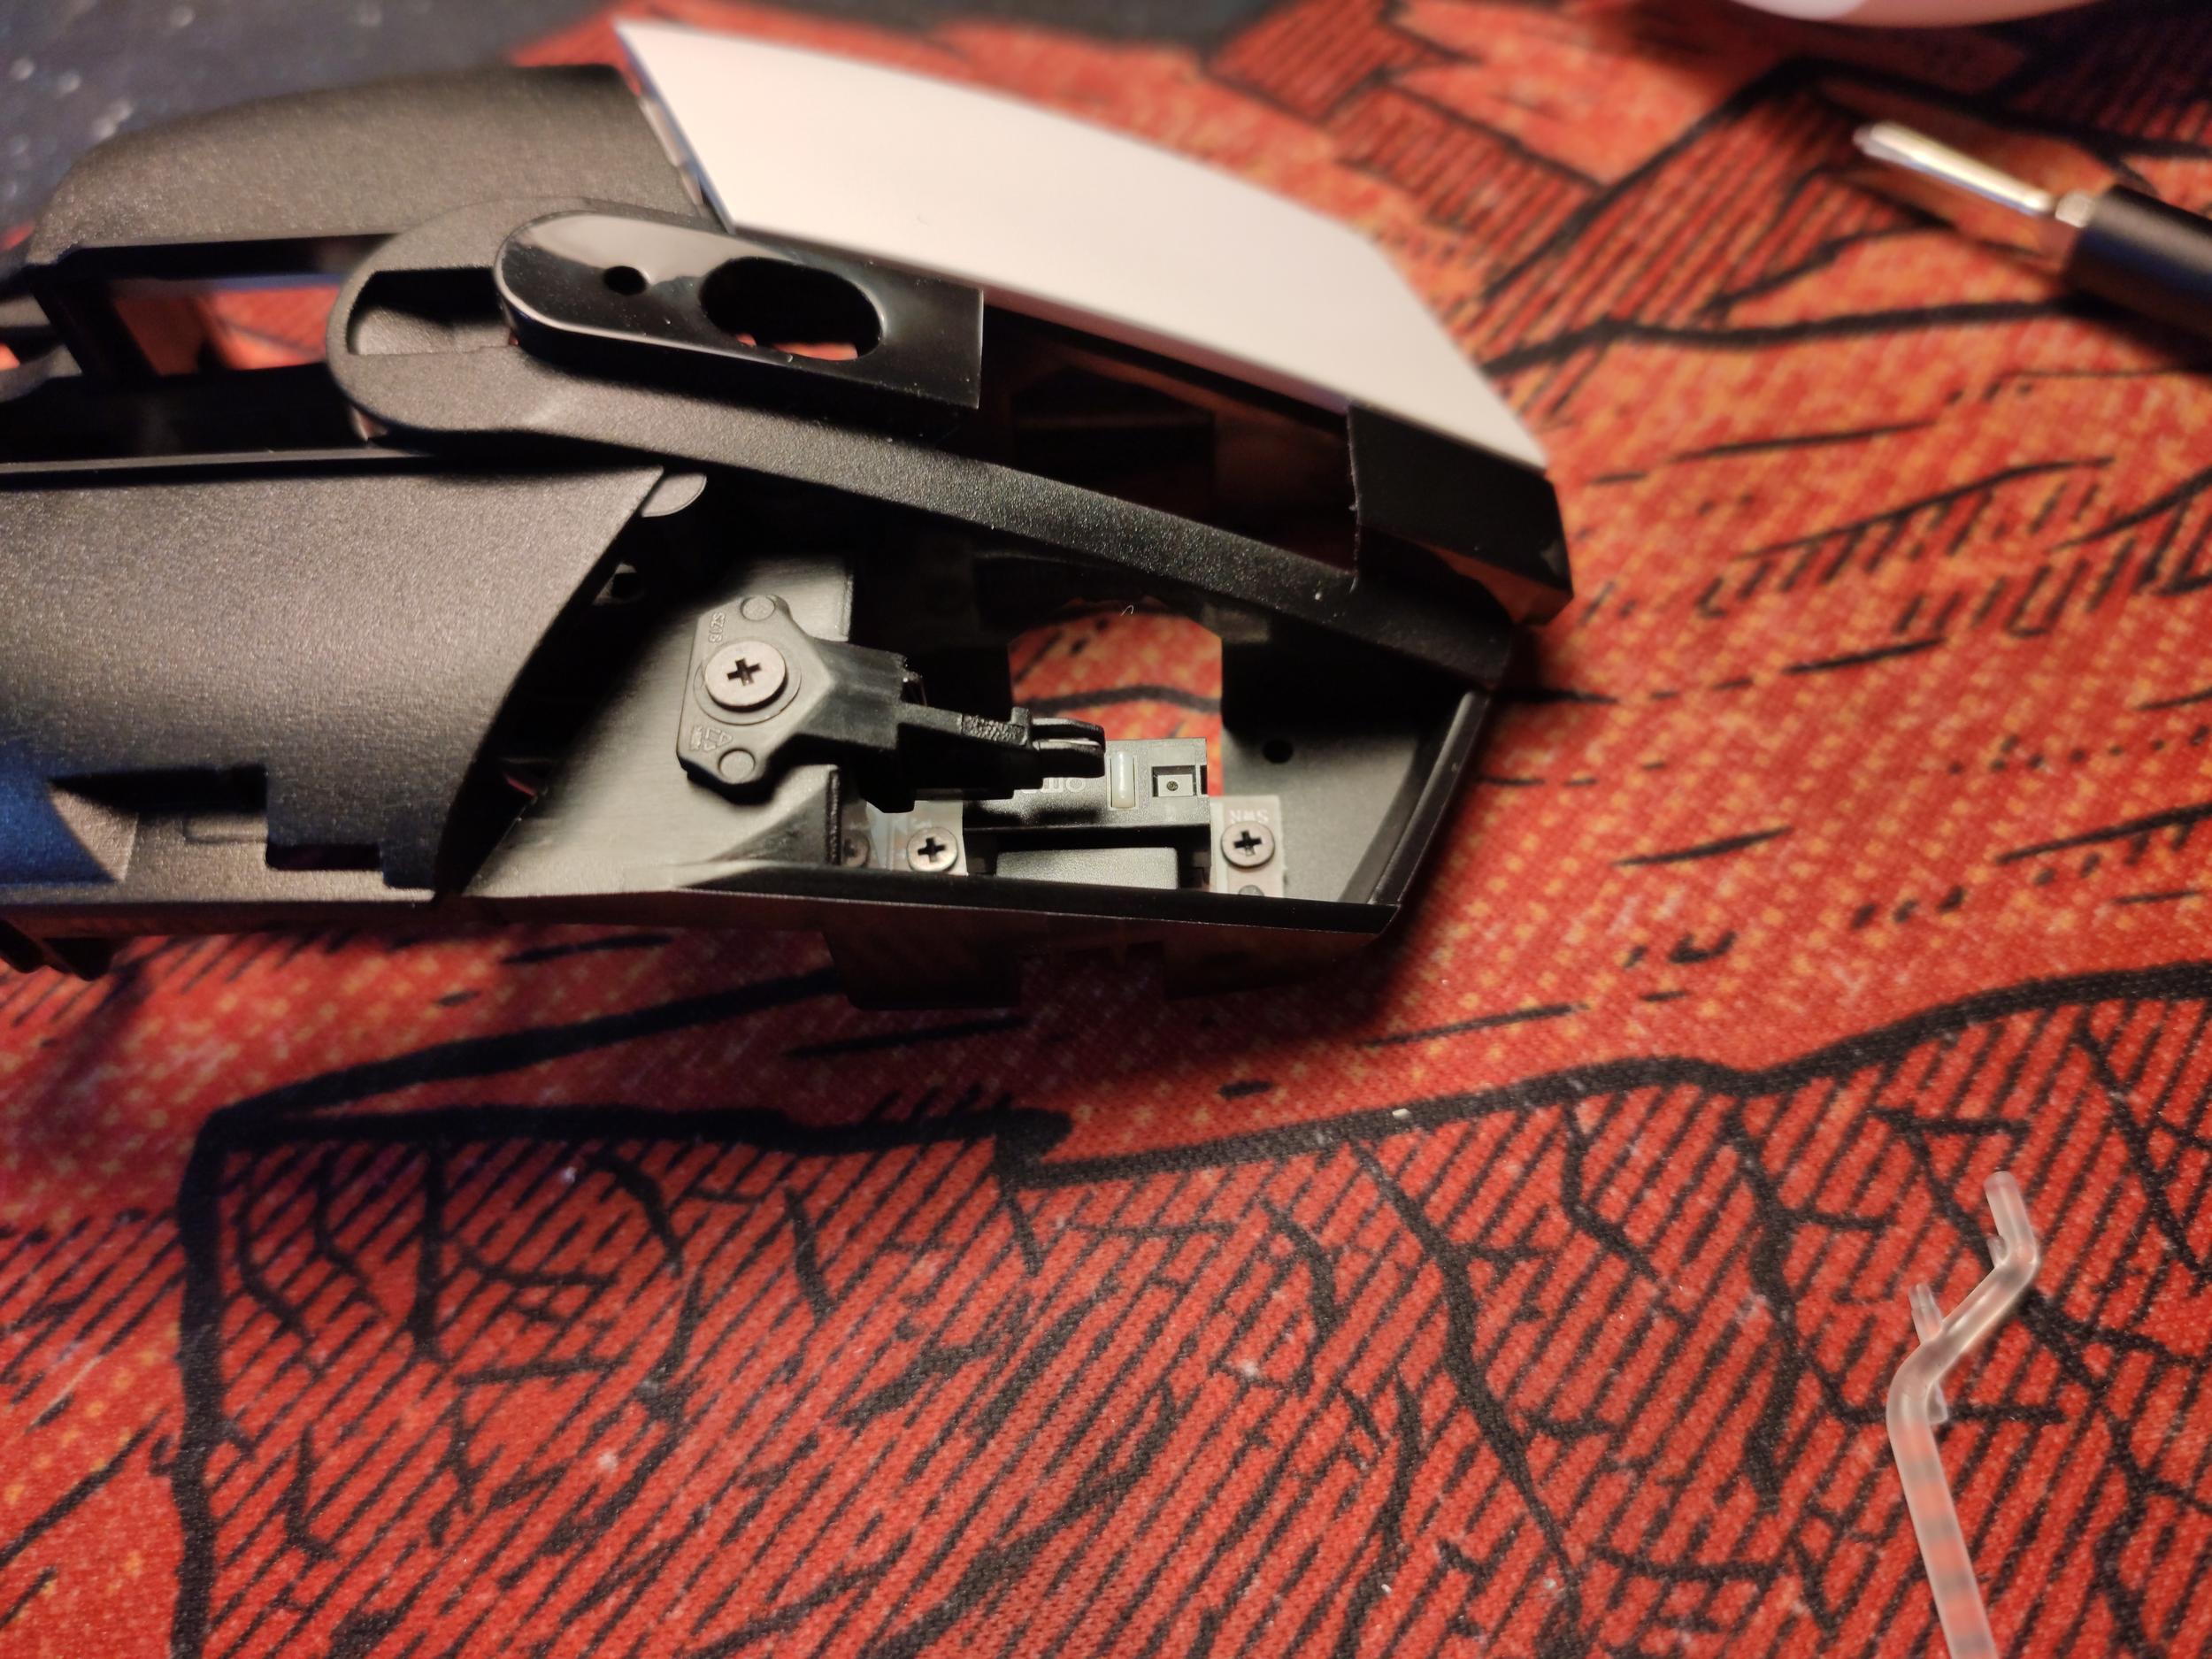
- Remove the two screws which hold the two plastic springs located below the main buttons.
- Take out the two plastic springs located below the main buttons.
- Remove the four screws holding the two main button switches.
- Gently wiggle out and then slide out the two main button switches. I did this without detaching the main button cables from the upper part of the plastic shell to make sure that the cables don't get damaged.
In case you mixed the screws up
- four tiny screws with small heads hold down the two boards on which the main button switches are located
- four large screws are located below the silders
- all other screws with large heads are identical
2023-05-03